
 Read more on our blog and join the mission today!
 Magic Renova DIY Kit
About the Product
Guide
Reviews
FAQs

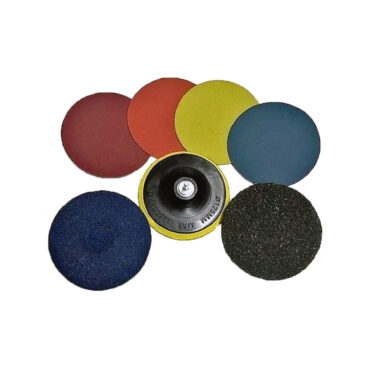
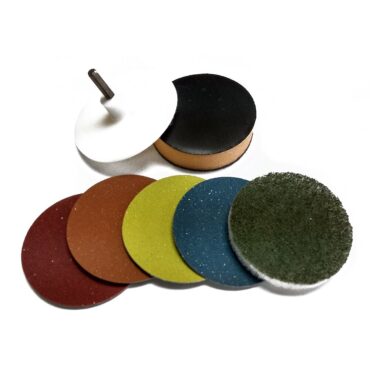
Preparation:
- Attach the drill bit pad to your drill
- Attach the thick velcro disc to the drill pad (5 inch has a thin velcro pad)
- Attach the colored polishing pads to the velcro disc
Directions:
Step 1: Red Pad– This first step will remove etch marks and minor scratches from the surface of the stone.
- Add clean water to the surface and in a clockwise circular motion buff the surface until there is a consistent matte finish.
- Rinse and dry the surface completely. Look to make sure the surface looks uniform before continuing to the next step.
Step 2: Orange Pad– This step will prepare the surface for a fine polished finish.
- Apply water to the surface, and work in a clockwise circular motion until there are no scratches left on the surface from Step 1.
- Rinse and dry completely. Again, check for uniformity and make sure no scratches are left from the previous step.
- For a honed finish, this is the final step. You do not need to use the yellow, blue, or green pads.
Step 3: Yellow– This step will create a high gloss, one you can see with a clear reflection from an angle.
- Apply clean water to the surface and work in a clockwise circular motion until high gloss has been achieved and there are no scratches.
- Rinse and dry completely. Inspect your surface for uniformity before continuing to step 4.
- Remember, the process ends when the desired finish is achieved.
- Continue to step 4 if you desire a brighter look or a mirror finish to your stone.
Step 4: Blue Pad– This step will increase the high gloss finish and prepare for the final step.
- Apply clean water to the surface and work in a clockwise circular motion until high gloss has been achieved and there are no scratches.
- Rinse and dry completely.
- Inspect your surface for uniformity before continuing to step 5.
- Remember, the process ends when the desired finish is achieved.
- Continue to step 5 if you desire a brighter look or a mirror finish to your stone.
Step 5: Green Pad– This last step will create a mirror finish.
- Apply clean water and work in a clockwise circular motion until the desired level of polish or shine has been achieved.
- Rinse and dry completely.
- Repeat Step 5 one more time with fresh water. This will complete the process.
- If you are looking for an extra “pop” of shine try pairing this green pad with a polishing compound like MB-22 one last time.
Frequently Asked Questions
What is the Magic Renova DIY Kit used for?
What polishing powders can I use with the kit?
Does it come with marble polishing powder?
What polishing equipment do I need to polish marble with the Magic Renova DIY Kit?
How do I know which pad to use?
What natural stones can I use the kit on?
Do I need prior knowledge before polishing marble surfaces with the kit?
Can I use the kit to remove etch marks and dull spots on my countertop?
Does it remove scratches and more extensive damage?
Will the polished marble be slippery?
Is a pad driver included with the kit?
Can I use the Magic Renova DIY Kit on black and white marble?