
 Read more on our blog and join the mission today!
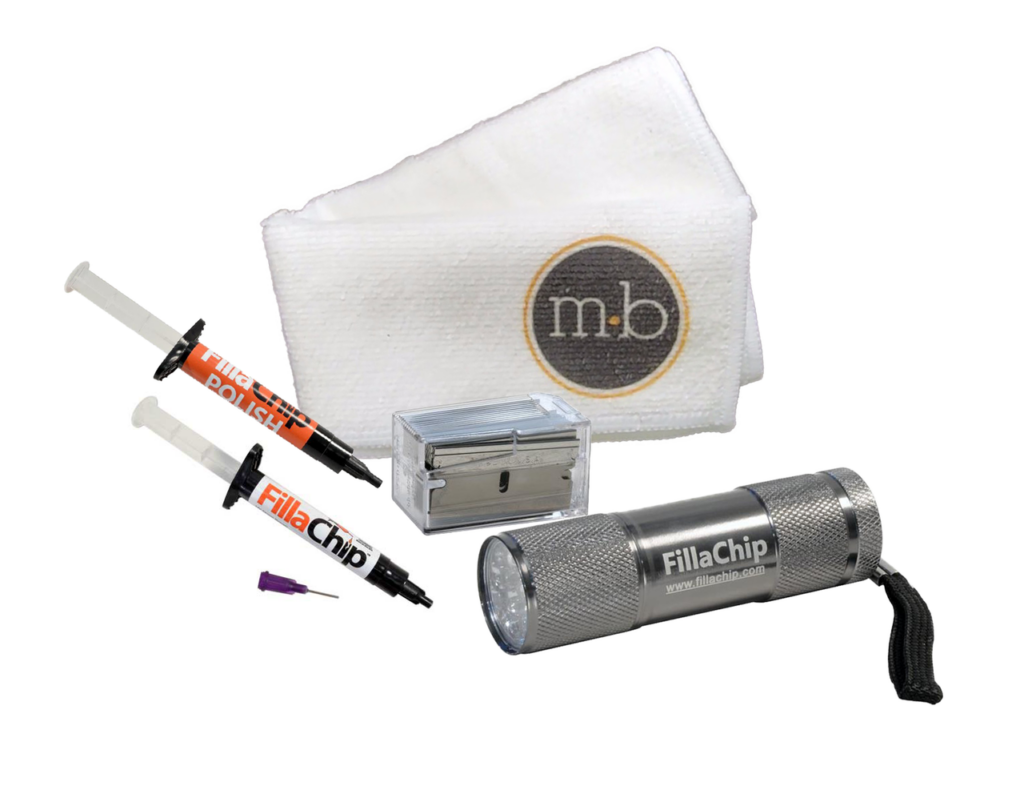
 DIY Chip Repair Kit
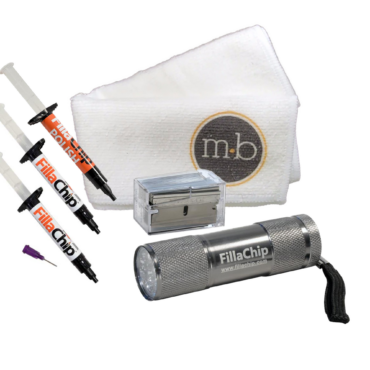
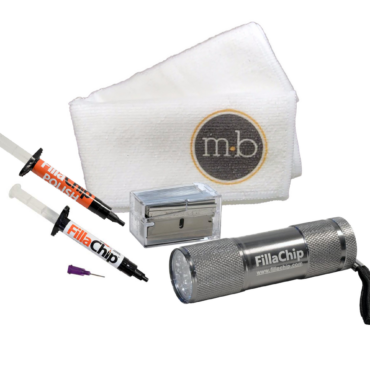
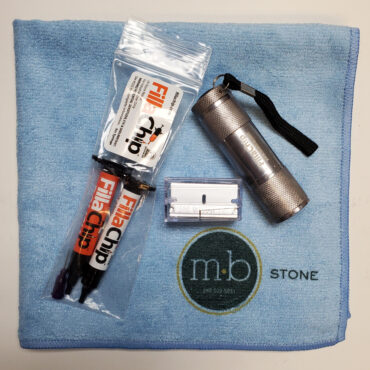
About the Product
Guide
Reviews
Preparation:
- Be certain to remove any excess residue off the surface of the stone.
- Use rubber gloves at all times when handling the product.
- Clean the surface with something like our Easy Oxy Daily Cleaner.
Directions:
- Use rubber gloves. Grab your clear or color glue syringe and remove the black tip by unscrewing it from the syringe.
- Attach the included purple tip to the syringe by screwing it on.
- Fill the chipped area with the glue syringe. (Thickness should be 1/16 to 1/8 of an inch. If the chip is deeper, you will need to repair in layers.) Do not overfill.
- Place the clear release sheet on top of the glue and gently tap on it to flatten to the surface area. (You should not have a lot of excess around the chip.)
- Grab the included UV light and turn it on. Place the UV light on the release sheet. The light should remain on the release sheet for a minimum of 60 seconds. You may leave it longer if you press on the release sheet and you see the glue is still in a fluid form.
- If your chip is deeper then you will repeat steps 3-5 until the chip is filled completely to the surface top.
- Once the glue has completely cured, use an included razorblade and shave any excess off to level. (Please see video below for how to shave without scratching your stone.)
- Once you have shaved off all the excess, grab the polish and attach a purple tip to this as well. Place a drop of polish on the repair and rub in with the microfiber cloth. This blends the repair to match the stone finish.
- Clean your surface with a pH-neutral cleaner like MB-5 Stone & More.